
Panasonic Lumix G9II Review: A Photographer's Perspective
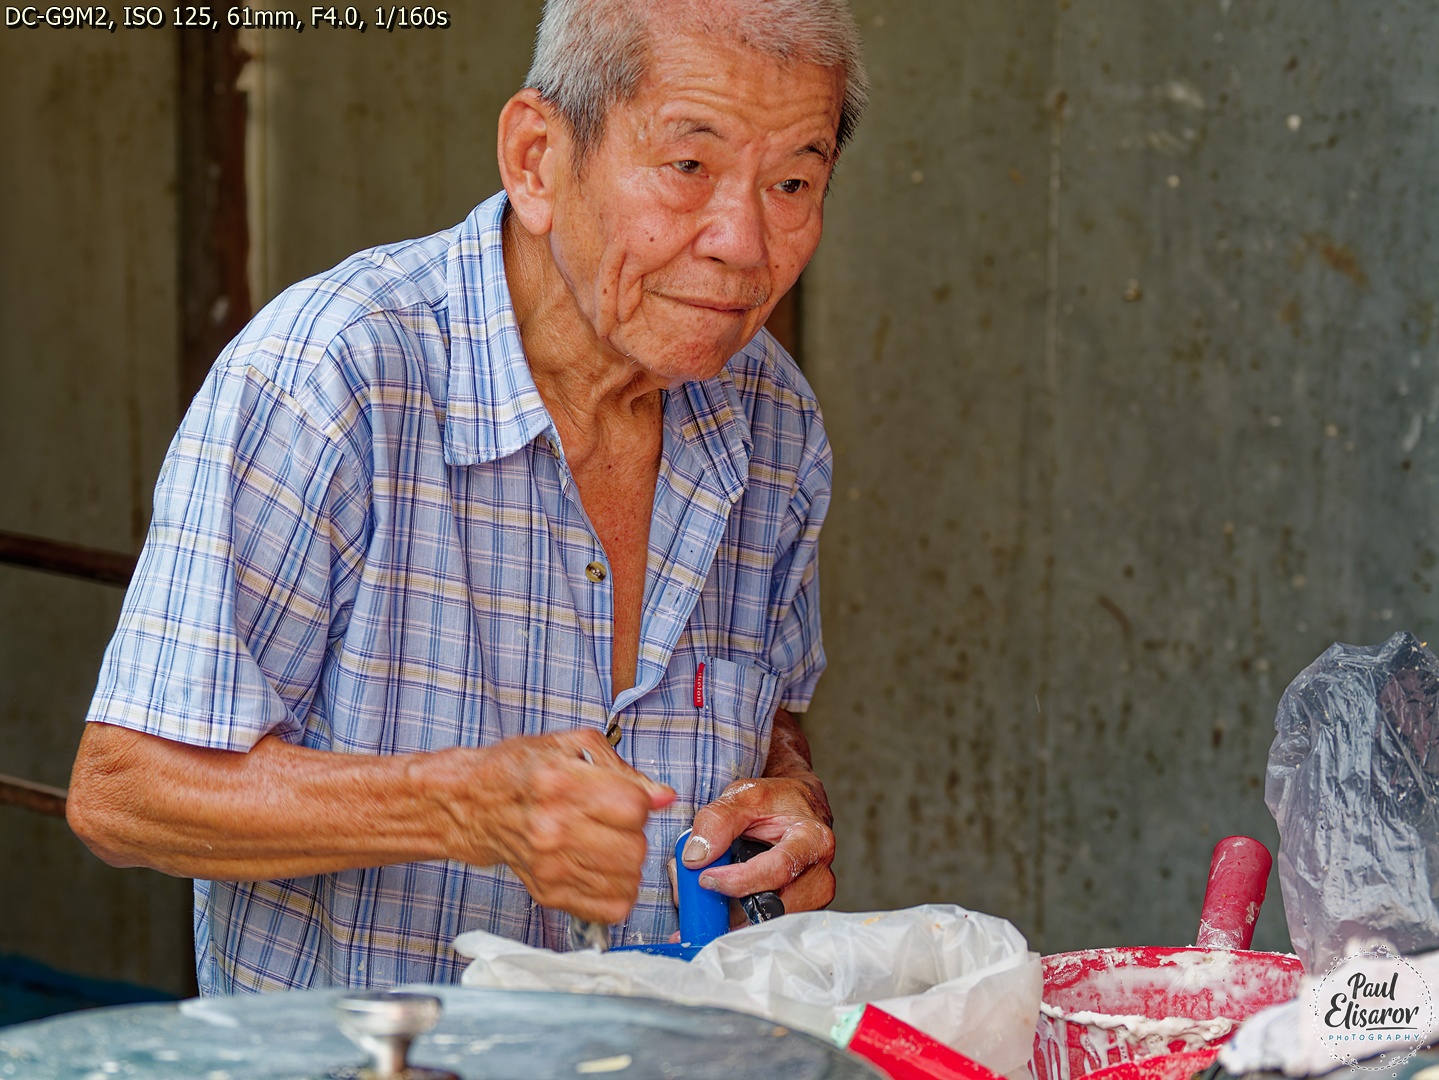
After two years of shooting with the original Panasonic G9, I finally made the upgrade to the G9II. Let me tell you, the decision wasn't as straightforward as you might think. The G9 had become an extension of my hand—every button, every dial mapped perfectly into my muscle memory. But technology marches forward, and the promise of phase-detect autofocus, better high-ISO performance, and that intriguing HHHR mode eventually won me over. So I bought it, took it into the field, and spent months putting it through its paces. This isn't a spec-sheet regurgitation; this is what it's actually like to shoot with the G9II as a stills photographer who couldn't care less about video features.
From the moment I unboxed the G9II, my brain knew something was off. My hand reached for controls that weren't there, my thumb searched for dials that had moved. Despite these initial ergonomic hiccups, which I'll dive into later, the first images I pulled off the sensor erased any doubts. The picture quality is simply outstanding—beyond praise, really. Colors? Classic Panasonic excellence, no caveats needed. That signature color science that made me fall in love with the system remains intact, rich and true without that artificial digital feel some brands struggle with.
The star of the show, even in these early tests, was the HHHR mode. I'll dedicate a full section to it later, but know this: it's a game-changer that Panasonic oddly whispers about instead of shouting from the rooftops. More on that soon.
Before we dive into the real-world experience, here's what you're working with under the hood:
- Sensor: 25.2MP Live MOS Micro Four Thirds sensor (up from 20.3MP in the G9)
- Image Processor: Venus Engine
- Autofocus: Hybrid Phase-Detect AF system with 779 phase-detection points plus DFD contrast AF
- Image Stabilization: 8-stop Dual I.S. 2 (sensor-shift + lens stabilization)
- ISO Range: 100-25,600 (expandable to ISO 50)
- Continuous Shooting: 60 fps with AF-S, 10 fps with AF-C (mechanical shutter)
- Shutter Speed: 1/8000s (mechanical), 1/32,000s (electronic)
- Viewfinder: 3.68M-dot OLED EVF with 120 fps refresh rate
- Rear Screen: 3.0-inch 1.84M-dot free-angle touchscreen
- Video: 5.7K 60p, 4K 120p (we'll leave it at that, since I don't shoot video)
- Storage: Dual SD card slots (both UHS-II compatible)
- Battery: DMW-BLK22 (new, higher capacity, backward compatible as power source)
- Connectivity: Wi-Fi, Bluetooth, USB-C (USB 3.2)
- Build: Weather-sealed magnesium alloy body
- Dimensions: 134.3 x 102.3 x 90.1 mm
- Weight: 658g (body only)
The Big Wins:
- Phase-detect AF finally replaces DFD-only system (more on this later)
- 25.2MP sensor vs. 20.3MP—a tangible but not transformational increase
- 8-stop stabilization vs. 6.5 stops, which is genuinely useful in real-world shooting
- 5.7K video if you care about that sort of thing (I don't)
- Dual UHS-II slots—both slots now support full speed, unlike the G9's UHS-I+II combo
- New battery with 20% more capacity and USB-C charging capability
The "Meh" Updates:
- Higher resolution screen (1.84M vs. 1.04M dots) that you'll hardly notice
- Slightly better EVF colors—nice but not worth upgrading for
- USB-C port replaces micro-USB, which should have been there years ago
The Downgrades That Actually Matter:
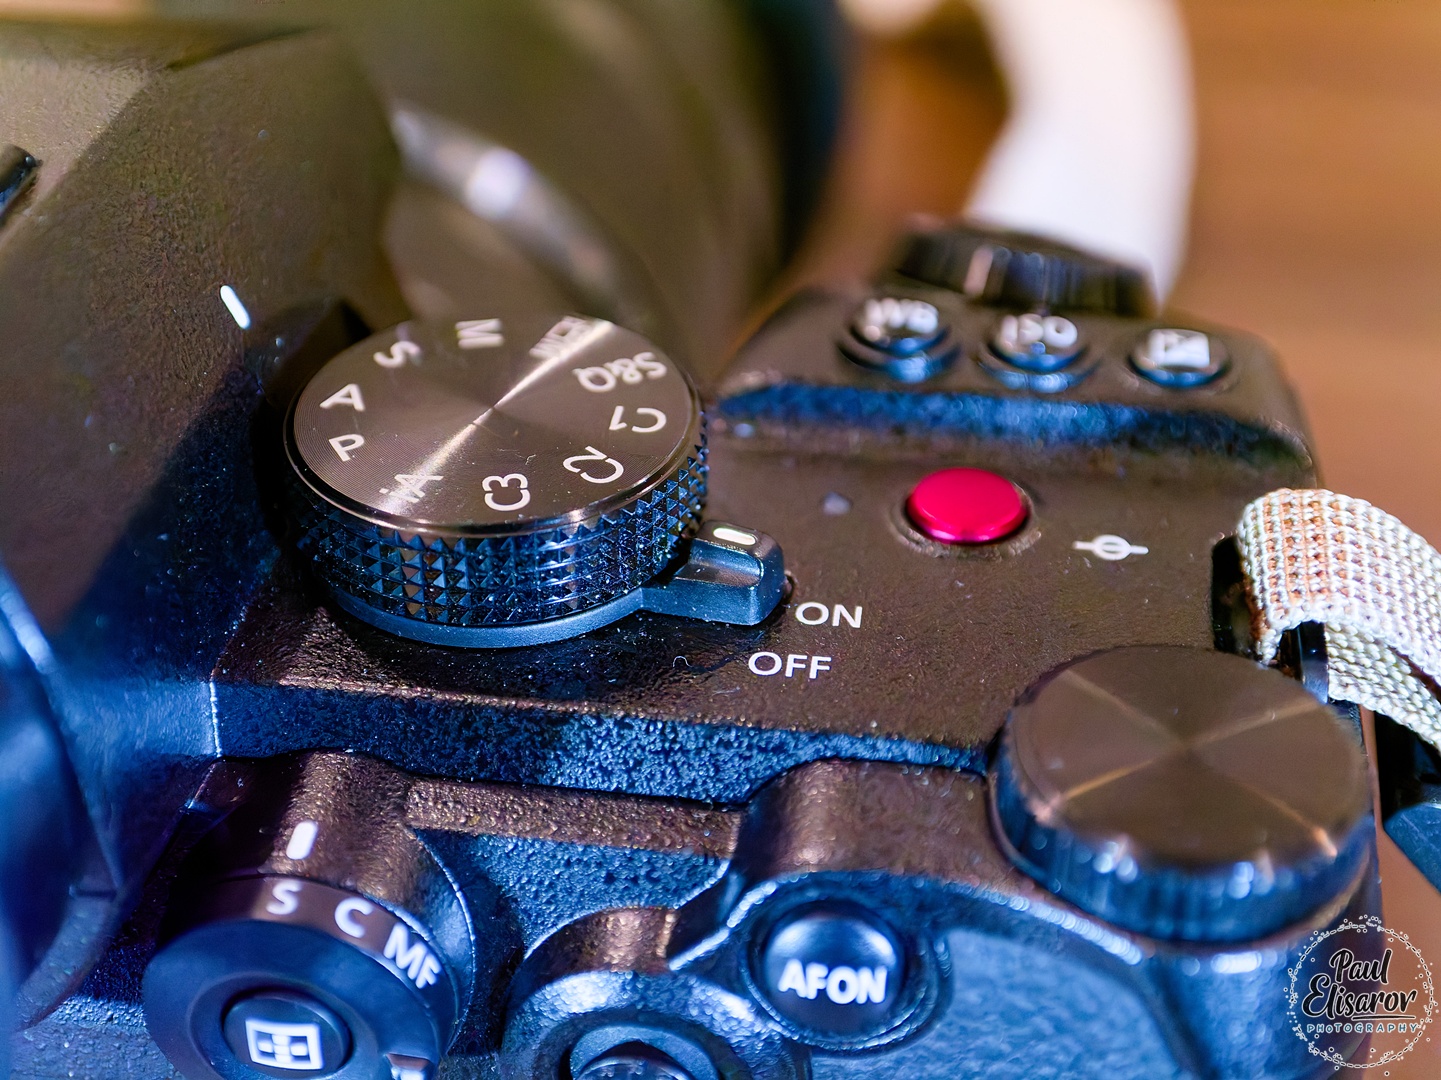
- No top LCD display—a real loss for quick settings checks
- 4K/6K Photo modes completely removed—taking Post Focus and in-camera Focus Stacking with them
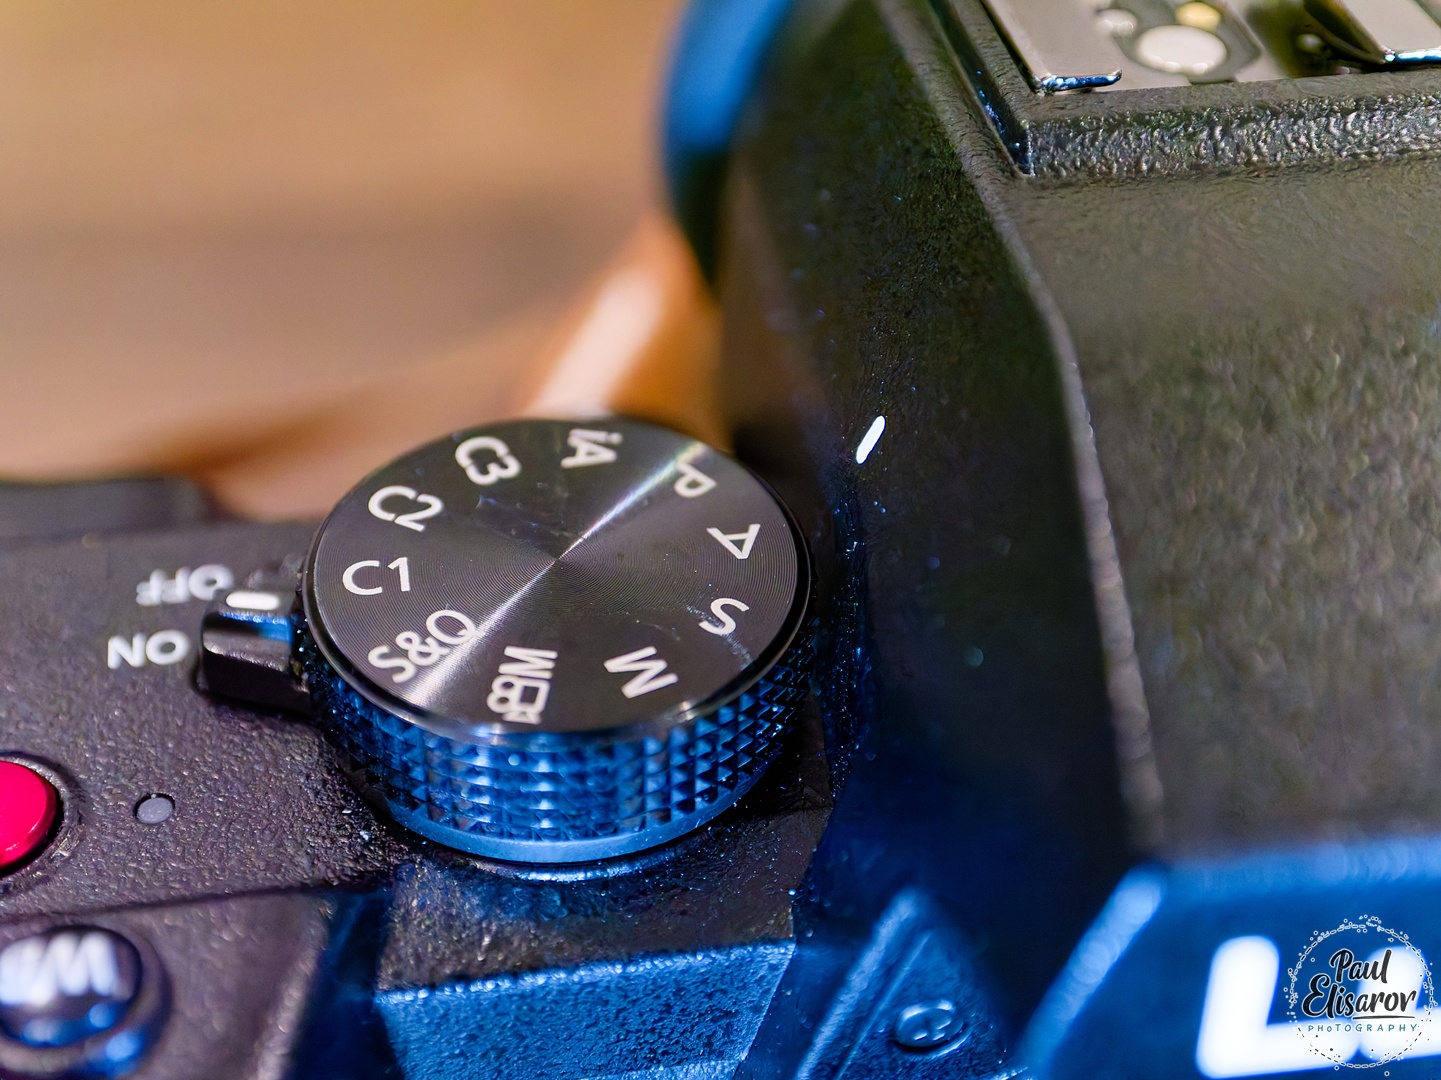
- No stacked mode/drive dial - I really liked that layout
- No physical silent mode switch—a constant daily annoyance
- iAuto ISO removed—replaced with dumb Auto (more on this later)
The bottom line? Panasonic giveth and Panasonic taketh away. Some improvements are substantial, but you pay for them with lost features that made the G9 such a joy to use.
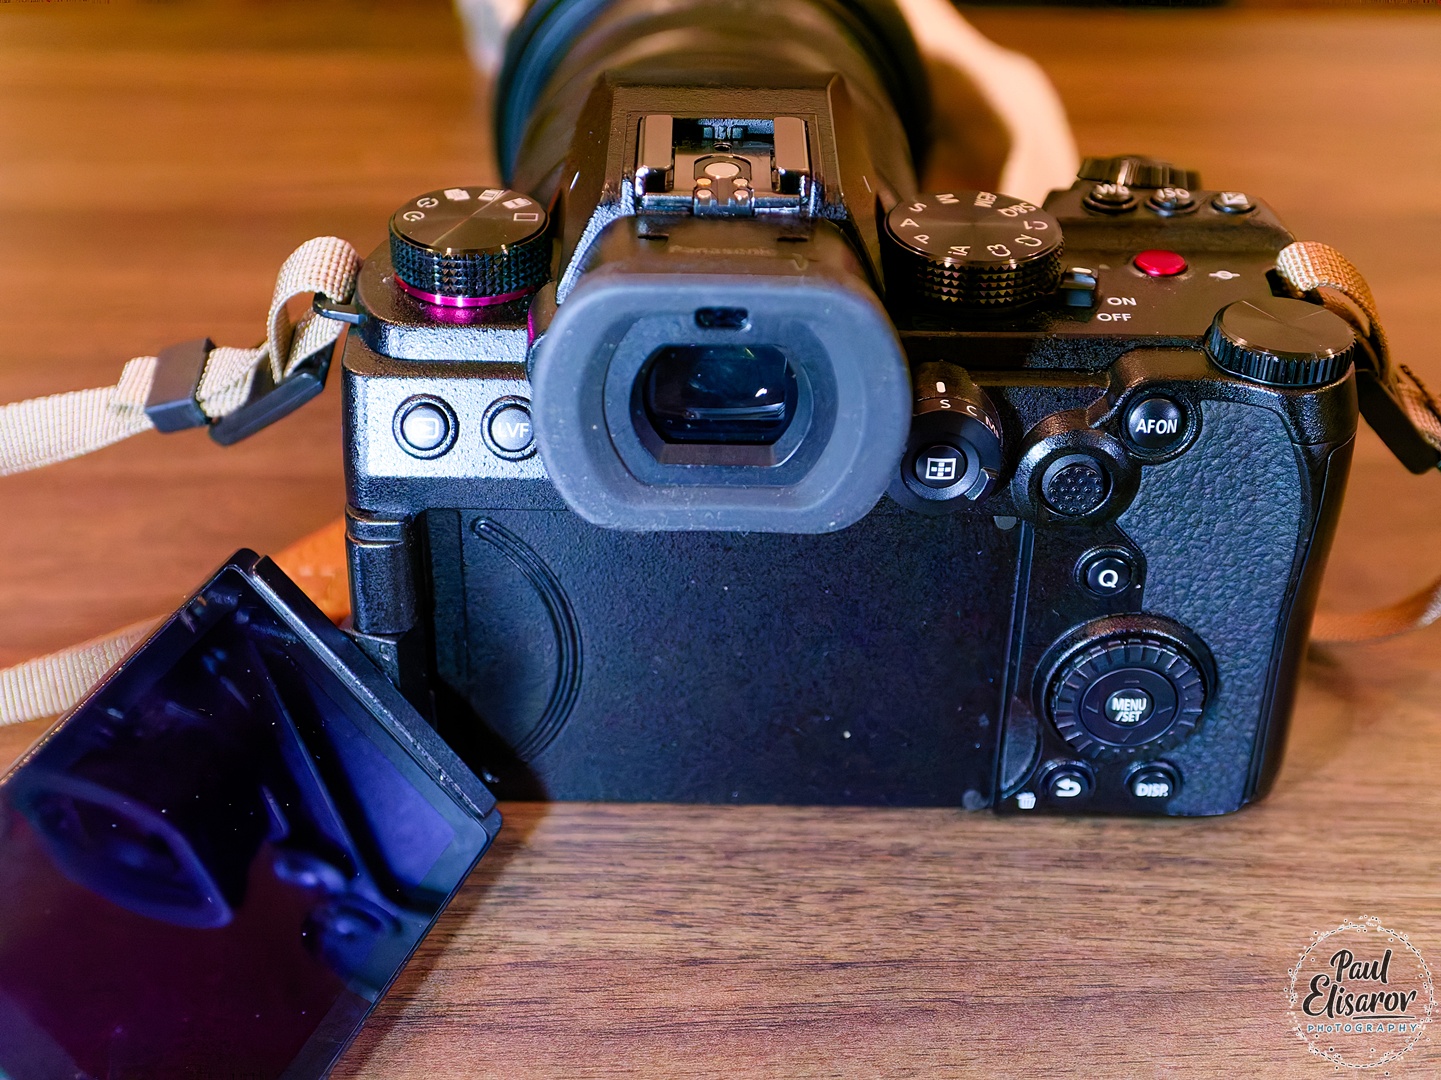
As always with camera reviews, I'll start with ergonomics because if a camera doesn't feel right in your hands, none of the specs matter. Here's where things get complicated with the G9II.
Panasonic made a curious decision here. The G9II is positioned as a professional camera—it's even called the Lumix G9 Mk II Pro and it's features are pro grade, but the body is borrowed from the Lumix S5 II, which is a mid-level camera, not a flagship. I'm still scratching my head over this choice. Yes, developing a completely new body costs resources, but they had the perfect template in the original G9. Instead, they went with the S5 II chassis, which brings both advantages and disadvantages. In my honest opinion, after months of use, the G9II body has more drawbacks compared to the G9 than benefits.
The grip itself is actually quite good—the camera hangs comfortably from relaxed fingers, allowing for hours of shooting with large lenses without fatigue. That's the positive. The negative? It's less "meaty" than the G9's grip, slightly narrower, which changes the position of my index finger. I have to bend it more to reach the shutter button, and after a full day of shooting, I notice the strain in a way I never did with the original G9.
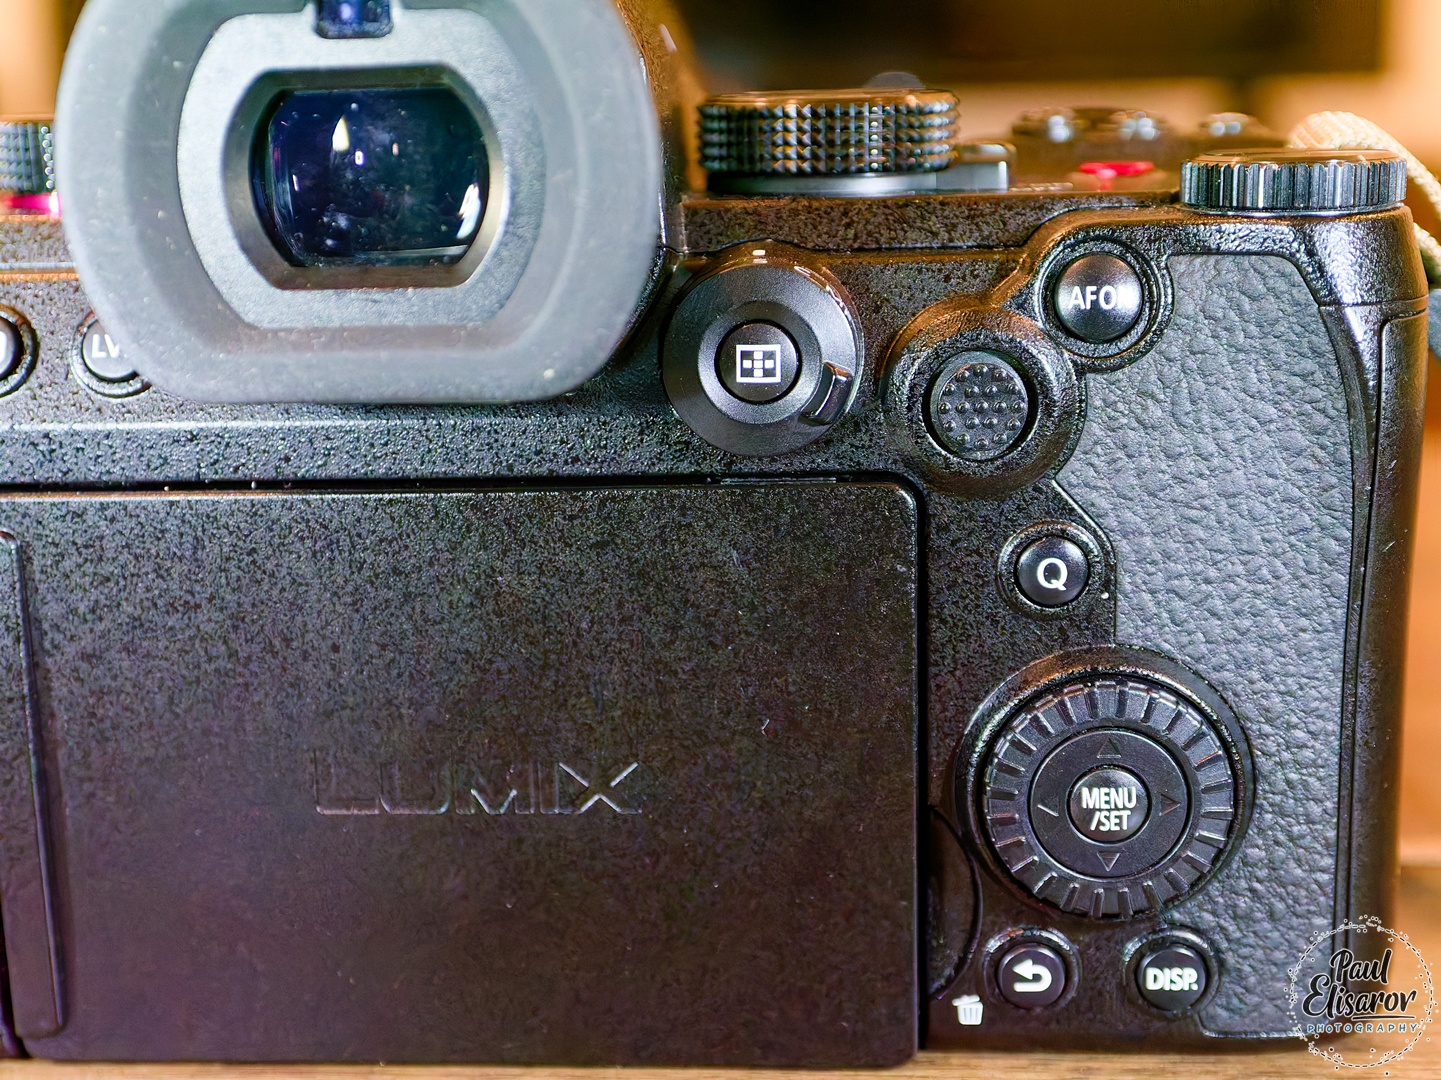
Fortunately, the G9II retains the fully articulating screen design I loved on the G9, but bumps the resolution to 1.84 million dots. Honestly? Visually, I can barely tell the difference. This feels like resolution for resolution's sake—nice on paper, imperceptible in practice. The EVF maintains the same 3.68M-dot OLED panel, but the colors are noticeably better—more vibrant and pleasant. It's a subtle but welcome improvement that makes the shooting experience more enjoyable.
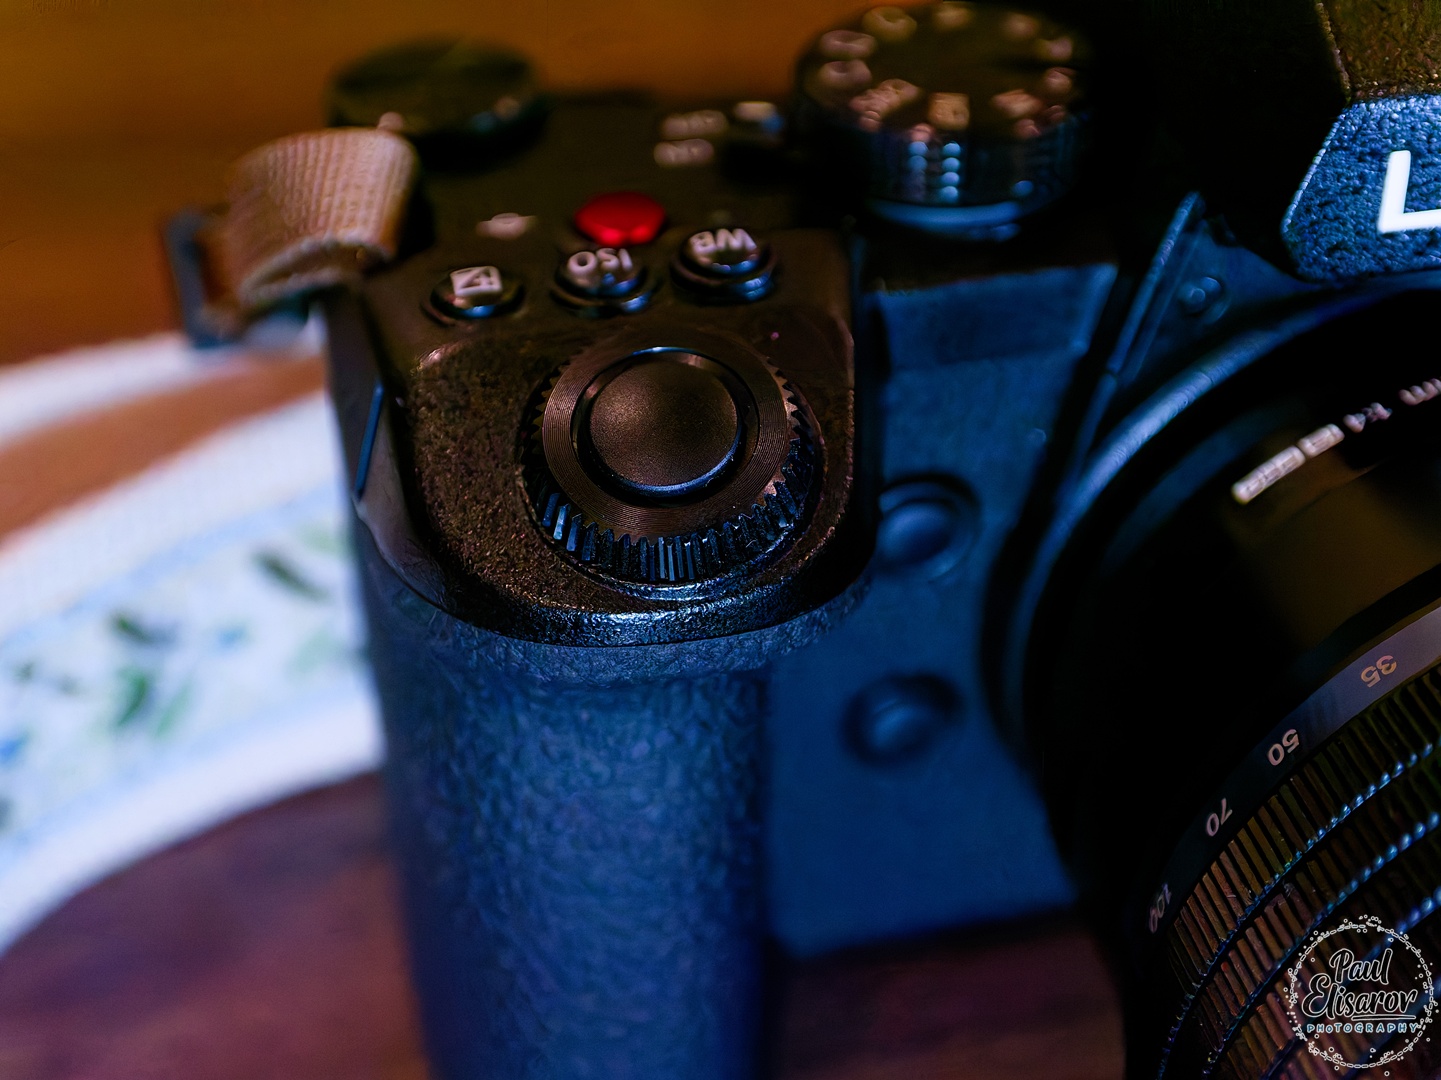
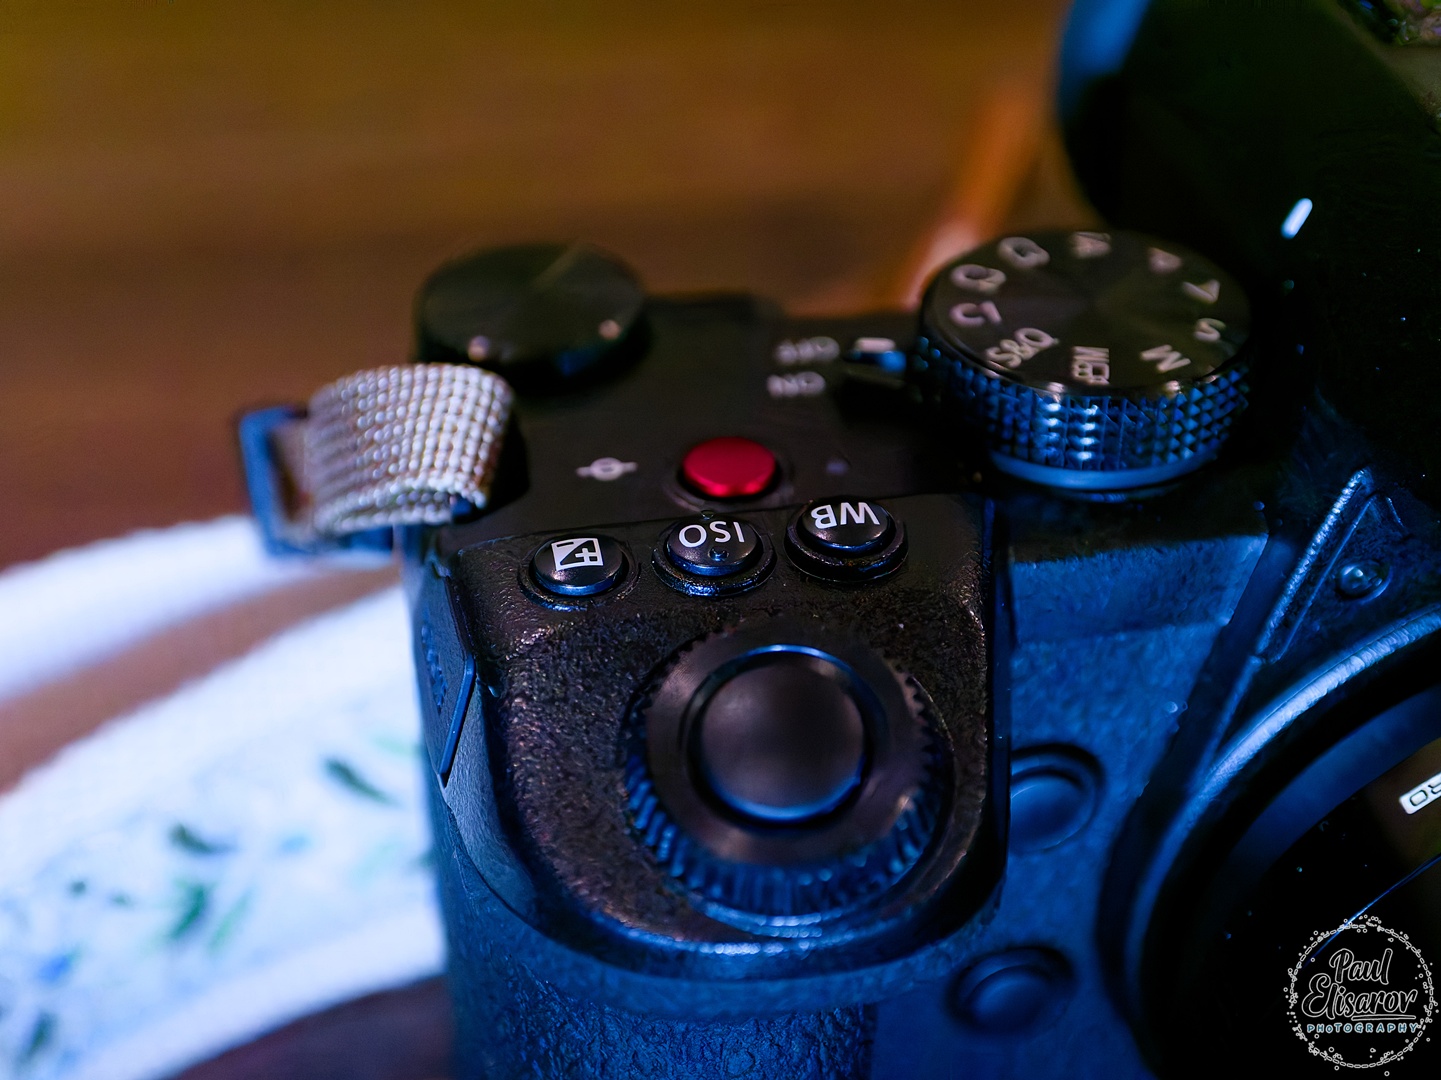
With all the features Panasonic removed or relocated, you'll spend your first week re-mapping buttons and building custom menus. The G9II's "My Menu" system is robust enough to partially compensate for the missing physical controls. I created a custom page with:
- Silent mode toggle
- Focus mode selection
- ISO limit settings
- Stabilization mode options
This helps, but it's a Band-Aid. A physical switch will always beat diving into menus, no matter how well-organized. The camera does allow you to assign functions to 10 different buttons/dials, but you'll find yourself sacrificing some assignments just to replicate basic G9 functionality. My advice: spend a day configuring before your first serious shoot, or you'll be fumbling when it counts.
Practical Performance: Beyond the Spec Sheet
Numbers are one thing, but how does the G9II actually perform when you're pushing it? The headline 60 fps with AF-S sounds impressive, and it is—I've captured birds like I never was able before. But here's what matters: the buffer. The G9II will swallow 200 RAW frames before slowing down, compared to the G9's more modest 50-frame buffer. This means you can actually use those high frame rates without immediately hitting a wall.
Autofocus: Finally, Phase-Detect Arrives
Panasonic finally caved and added phase-detect autofocus to their hybrid cameras, pairing it with their native DFD system. The marketing claims this dual system delivers unprecedented speed and accuracy. But what's the reality after months of shooting?
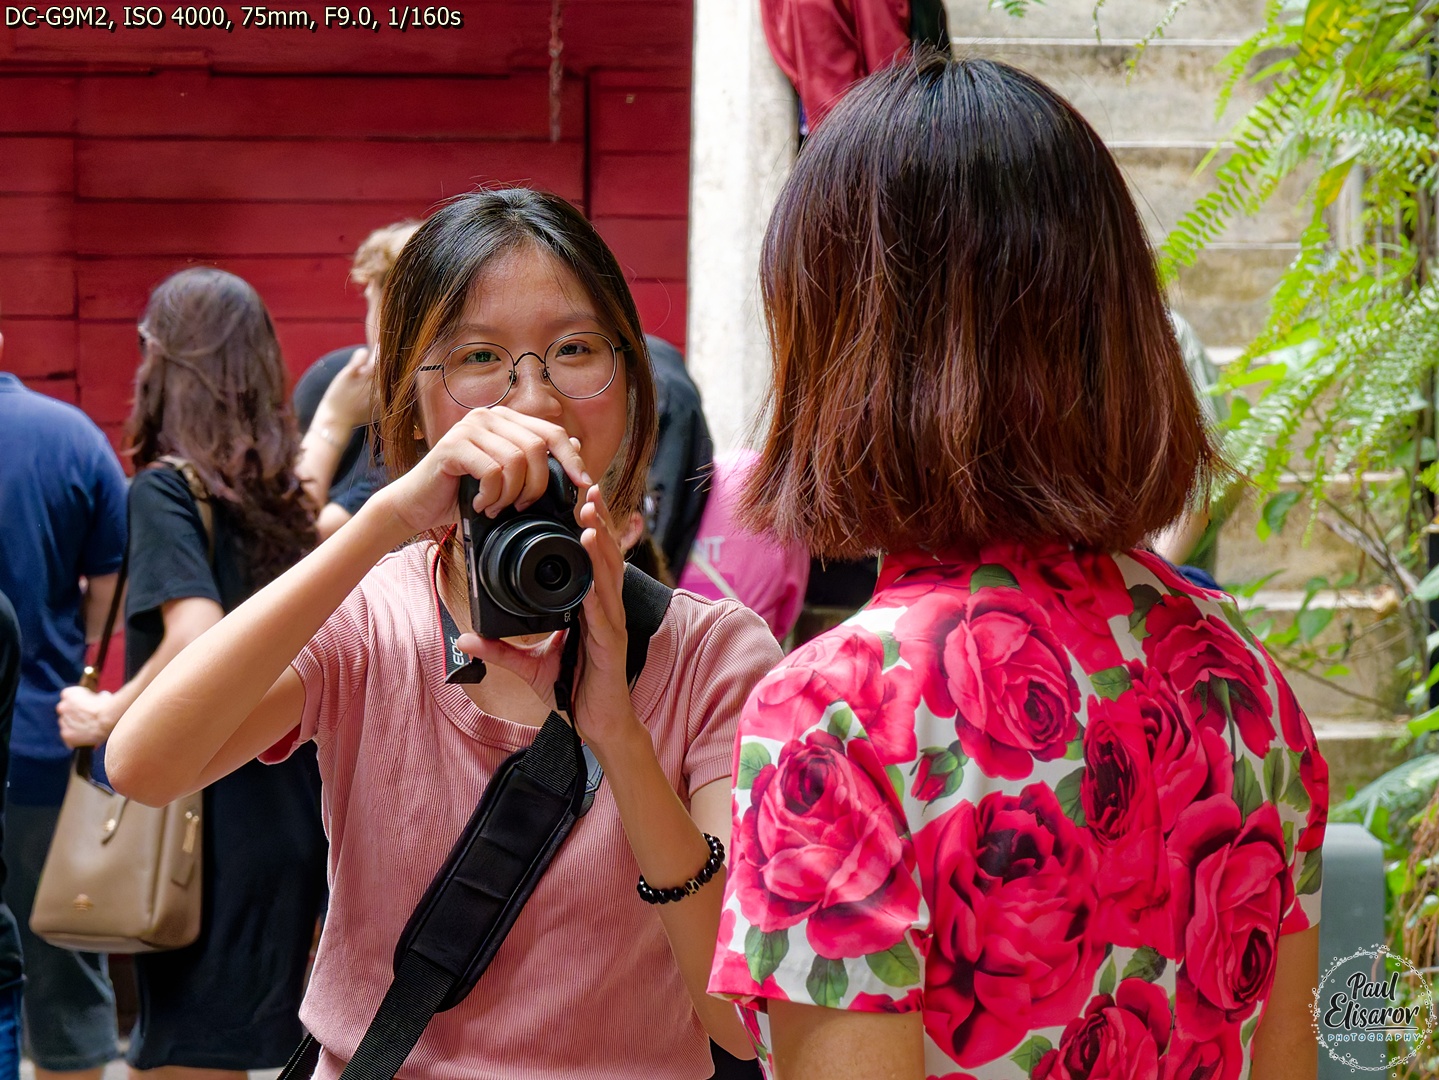
In single-shot AF mode, I honestly can't tell the difference from the G9. It's just as fast, just as accurate. With all the detection modes disabled and just straight single-point AF, there's no perceptible improvement. The only exception I noticed is with my Panasonic Leica 50-200mm lens—it gave me slightly more focus errors on the G9, and those have completely disappeared on the G9II. But that's the only lens where I've seen a difference.
Continuous AF: The Real Winner
Here's where phase-detect makes its presence known. AFC performance has improved dramatically—no more of that micro-wobble that plagued DFD in challenging conditions. Tracking accuracy is better, and misses on subjects moving toward you are almost nonexistent now. Everything stays in focus, which is a massive relief for action shooting.

The Missing Features That Hurt
But Panasonic giveth and Panasonic taketh away. Two incredibly useful features have vanished: Post Focus and in-camera Focus Stacking. These were tied to the 4K/6K Photo modes, which themselves are completely gone. I occasionally used the in-camera focus stacking feature on the G9—it was brilliant for macro work. The camera would rattle off a series of shots at different focal points and automatically blend them into a single, perfectly stacked image.
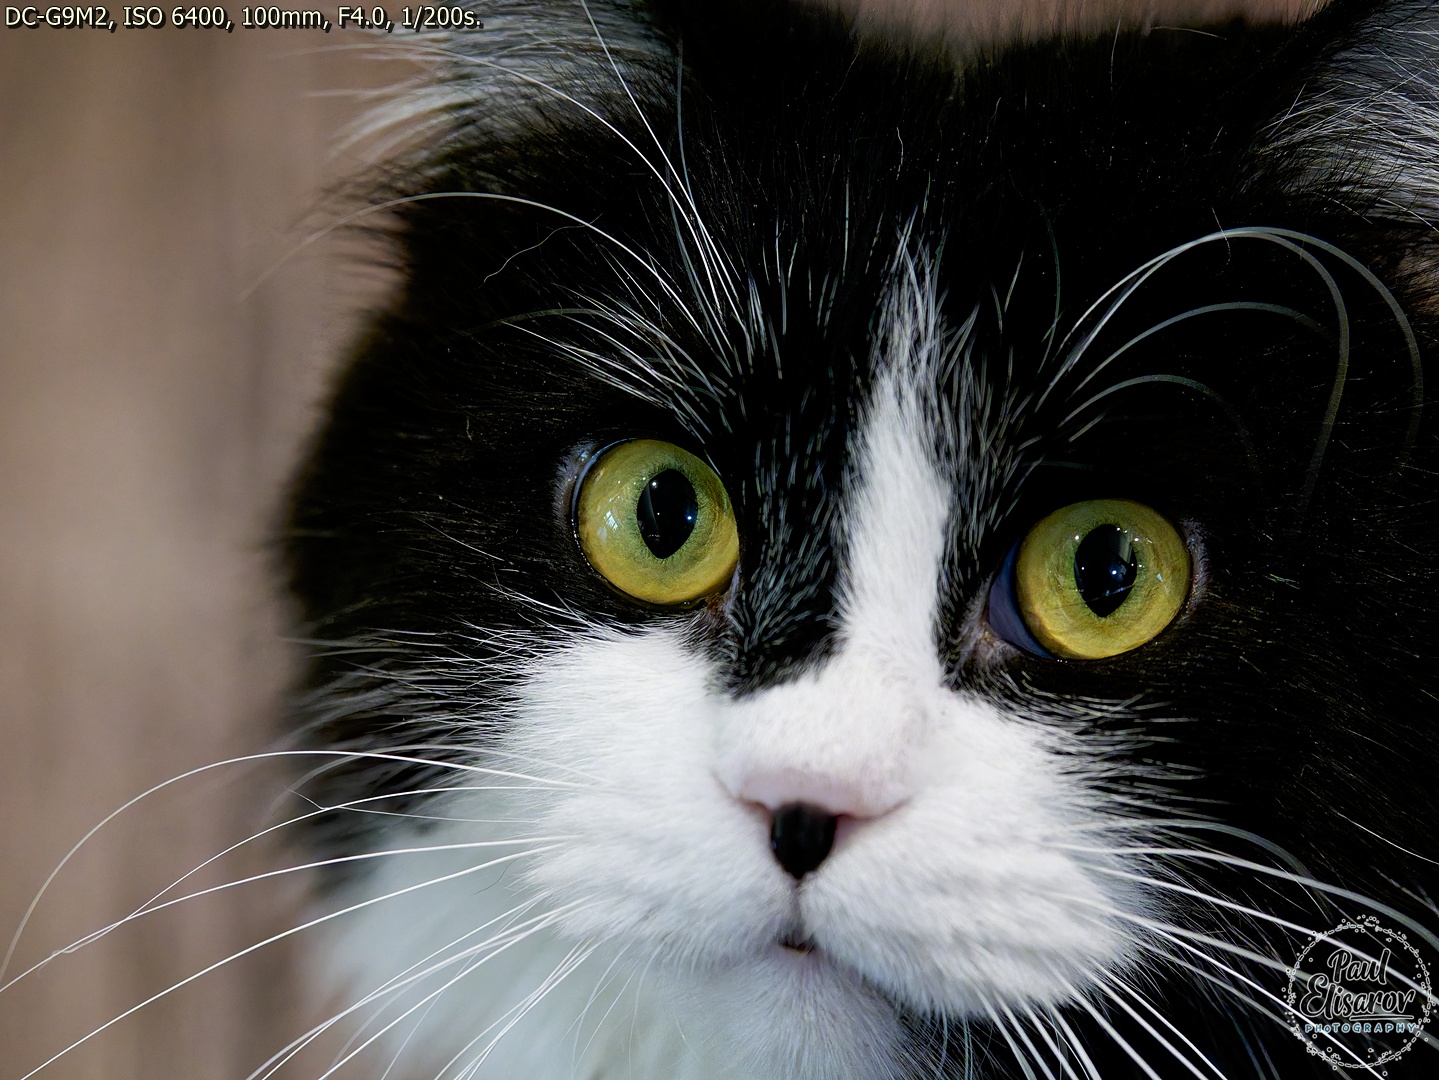
The G9II can still do focus bracketing, but you're left to manually stack the RAW files in post-production. Let me be clear: manually stacking dozens of macro shots is not something I ever want to do. It's tedious, time-consuming, and requires specialized software. This feels like a major loss for a camera marketed as a universal instrument. Makes me feel frustrated like this cat!

LUT: Fancy Filters or Real Innovation?
So what did we get instead of those useful features? LUT support through the Lumix Lab app. Look, I appreciate the effort, but this feels like a very questionable trade-off.
A LUT (Look-Up Table) is a mathematical file that transforms color values in your images. In photography, it's essentially a finishing style—a filter, if we're being honest. You can create these styles on your smartphone and load them into the camera, but they only apply to JPEG files. So you're "baking" a filter into your image at capture, which feels suspiciously like Instagram filters for camera nerds.
In my opinion, LUTs are more of a toy than a serious replacement for features like in-camera panorama stitching or focus stacking. "Baking" filters into JPEGs is a questionable pleasure—especially when you could achieve the same result with better control in post-processing. Maybe I'm just too old-school, but I don't see the appeal.
That said, if your workflow demands quick turnaround—shoot, transfer to phone, publish—then LUTs might make sense. Wedding photographers who need to get preview images to clients during a reception could find this invaluable. For my landscape and wildlife work? Not so much. The Reality Check: Adoption Rates and Learning
Curious about whether I was alone in my skepticism, I looked into how many photographers actually use LUTs. According to a 2024 survey of professional photographers by Aftershoot, while 73% have experimented with LUTs, only 23% use them regularly in their professional workflow. The majority still prefer traditional editing methods, citing greater flexibility and control. Another study from Imagen-AI found that professional photographers who do use LUTs typically maintain a small collection of 5-10 high-quality profiles rather than downloading hundreds of free options.
For those interested in exploring LUTs properly, I'd recommend starting with this comprehensive guide from professional photographer Wes Shinn: The Ultimate Guide to Cinematic LUTs for Photographers. It covers creation, application, and best practices without the usual marketing fluff.
Image Quality: Steady Evolution, not Revolution
The G9 already delivered excellent image quality, and the G9II doesn't fall behind. In fact, early firmware issues that made G9II files slightly less sharp than the G9 have been resolved—some update quietly eliminated that problem. Whether it was moiré suppression or phase-detection point masking, I don't know, but current output is crisp and detailed. As always with Micro Four Thirds, you need excellent glass to see what the system can truly do—budget lenses won't show you what this sensor is capable of.
More Megapixels: Welcome, But Not Essential
The bump to 25 megapixels from 20 is welcome. I tested this when the G9 launched—20MP was the minimum where you wouldn't feel pixel envy. Moving away from that edge gives more cropping flexibility and better detail rendering, especially with high-quality lenses.

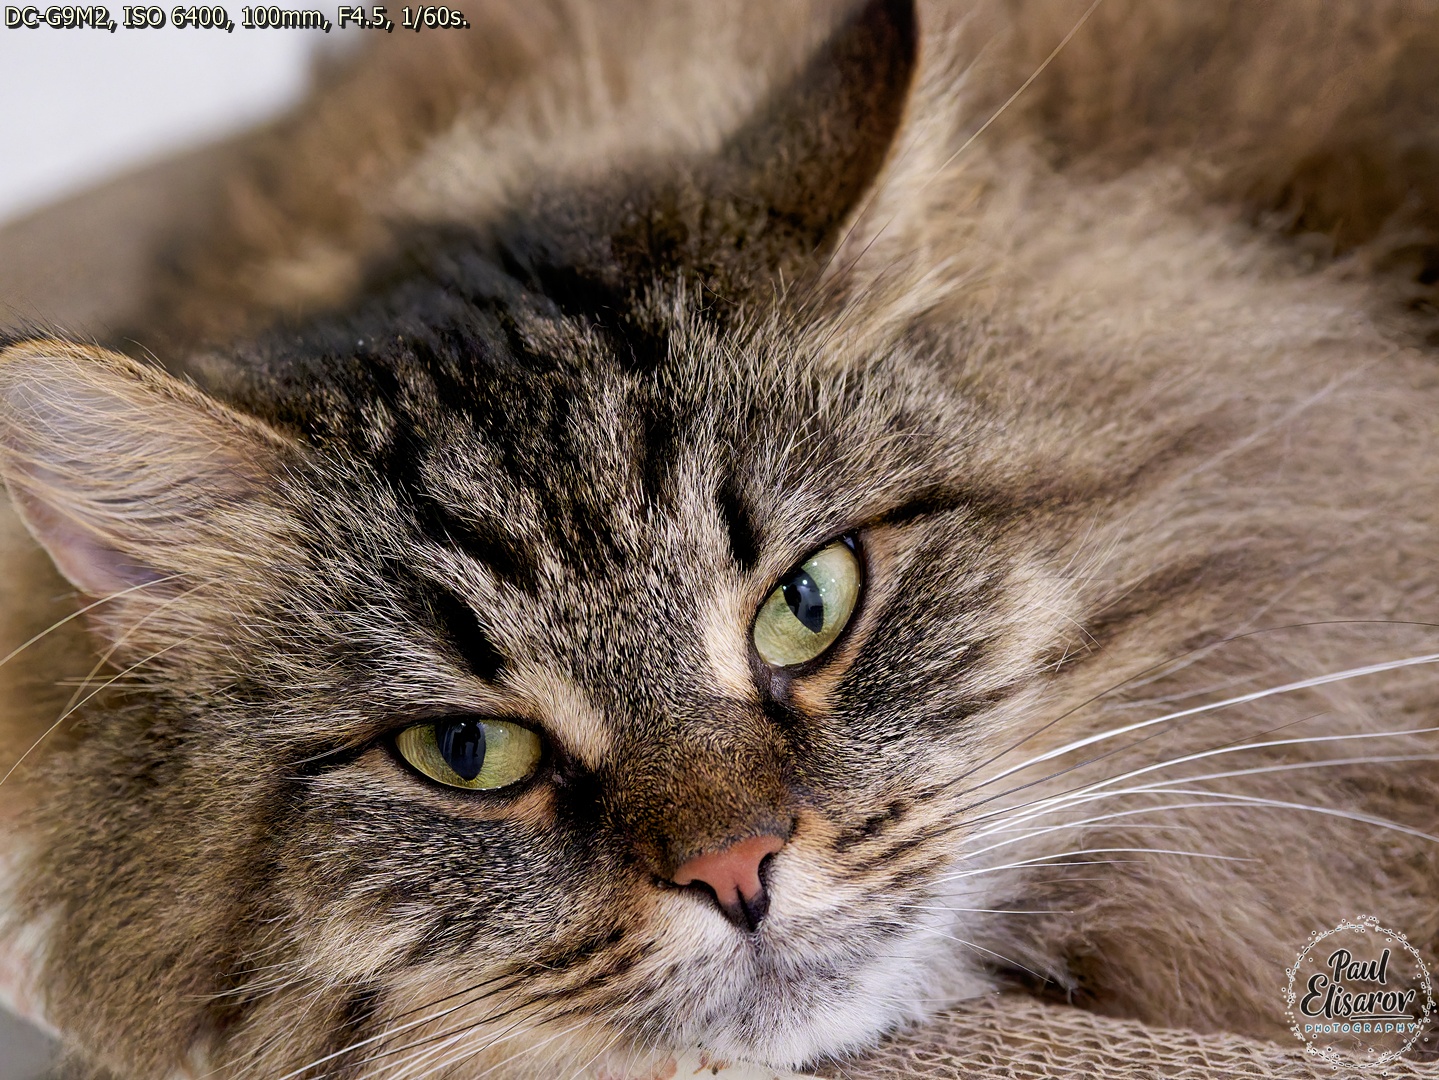
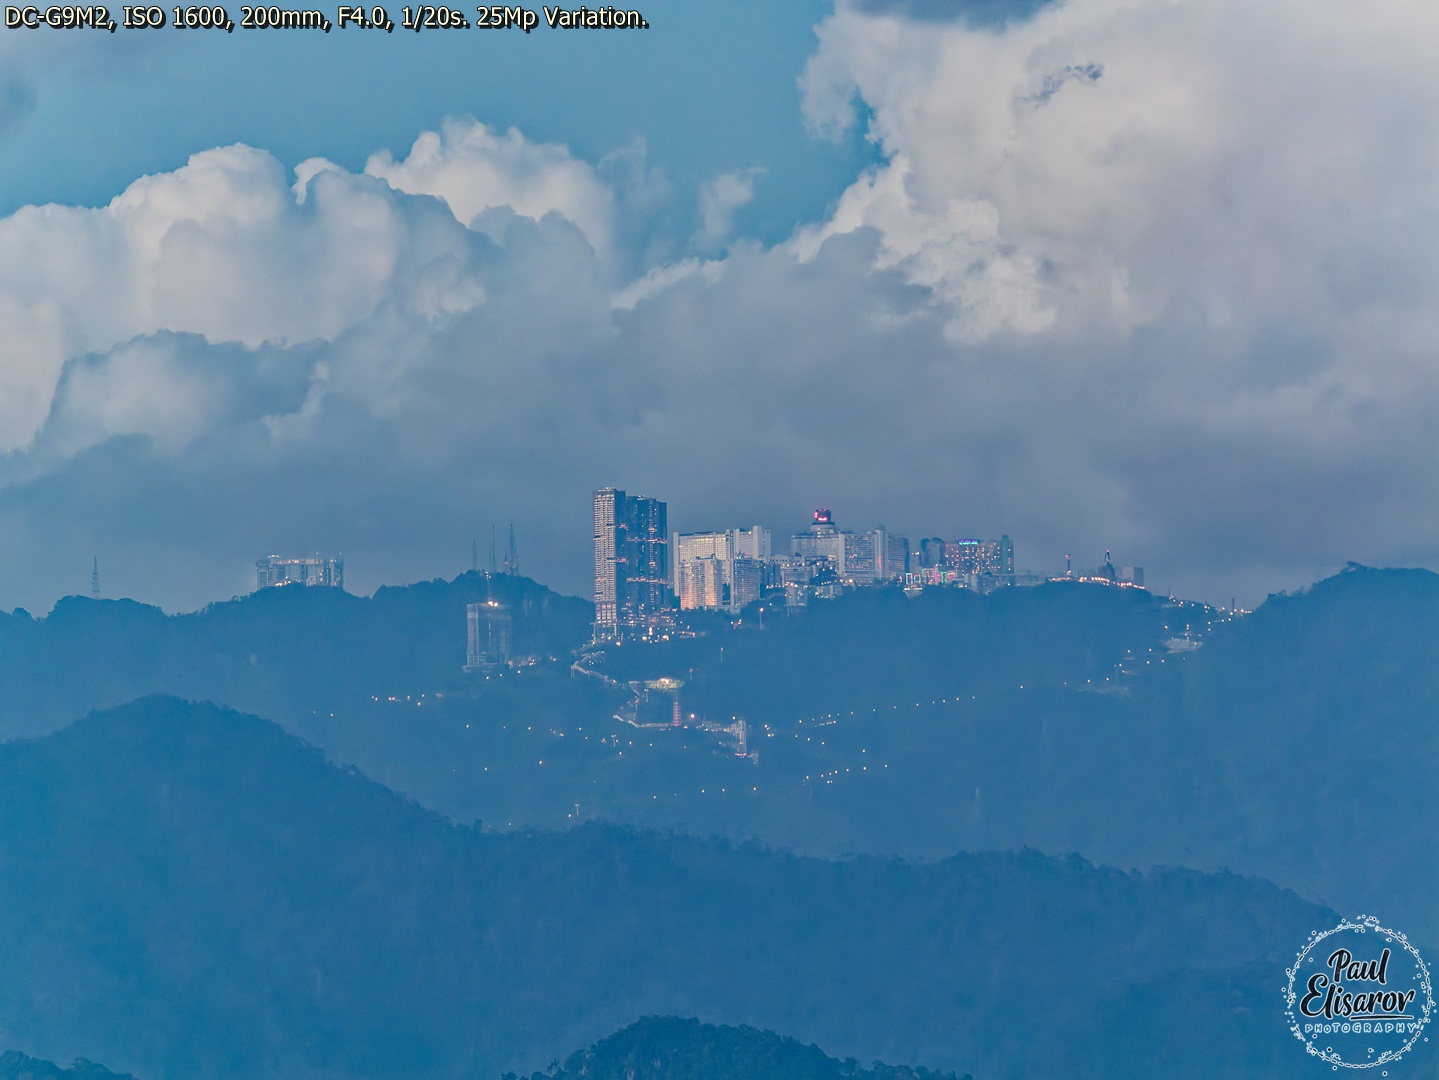
Image Stabilization: Still Industry-Leading
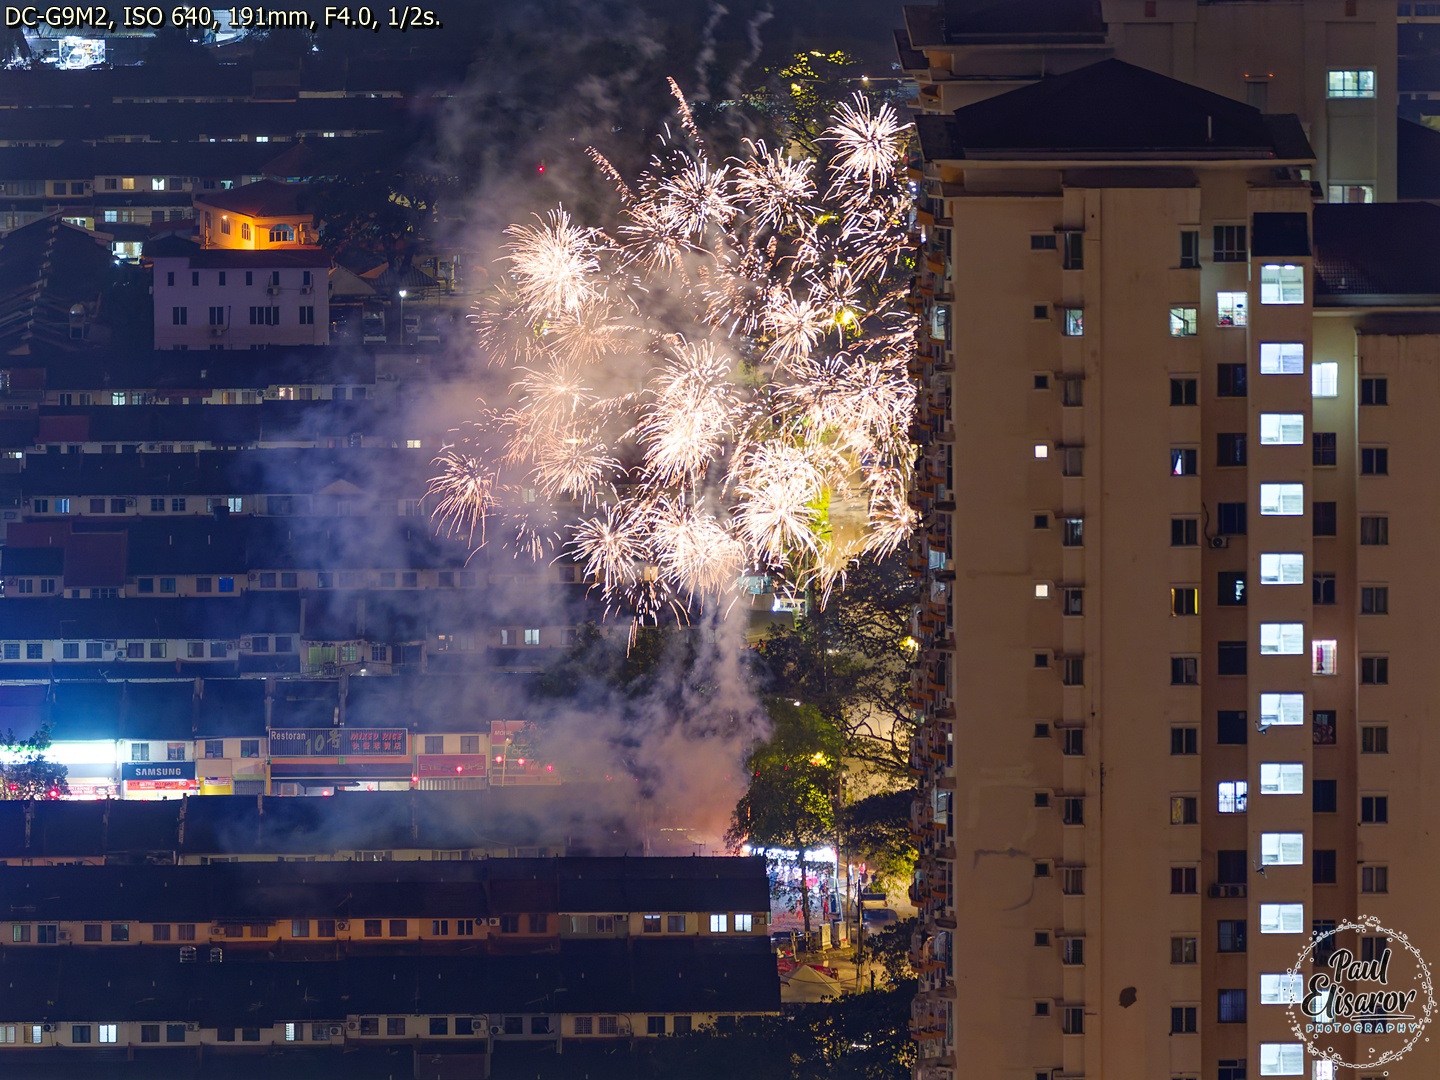
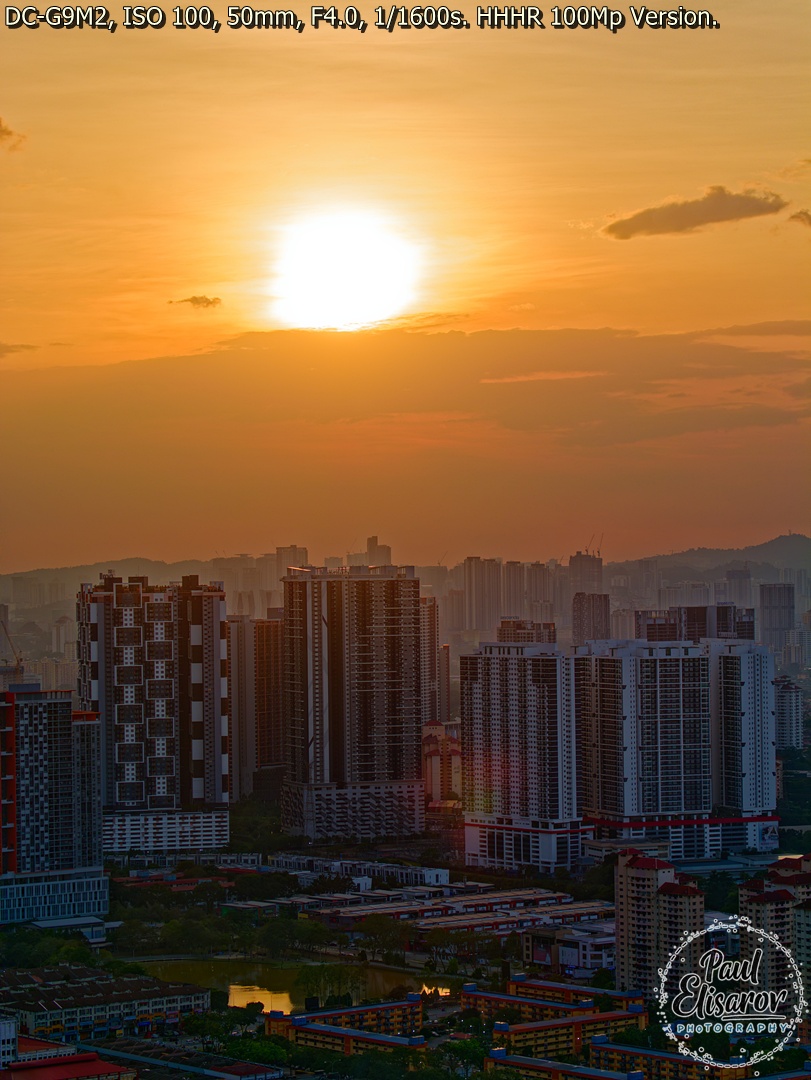
The G9's stabilization was already legendary, and the G9II maintains that crown. The 8-stop Dual I.S. 2 system is borderline witchcraft. I've handheld the Leica 100-400mm at 400mm (800mm equivalent) at 1/15s and gotten sharp shots. For static subjects, you can shoot multi-second exposures handheld—I've done 4-second shots of cityscapes at night that are tack sharp. It opens possibilities that would require a tripod on other systems.
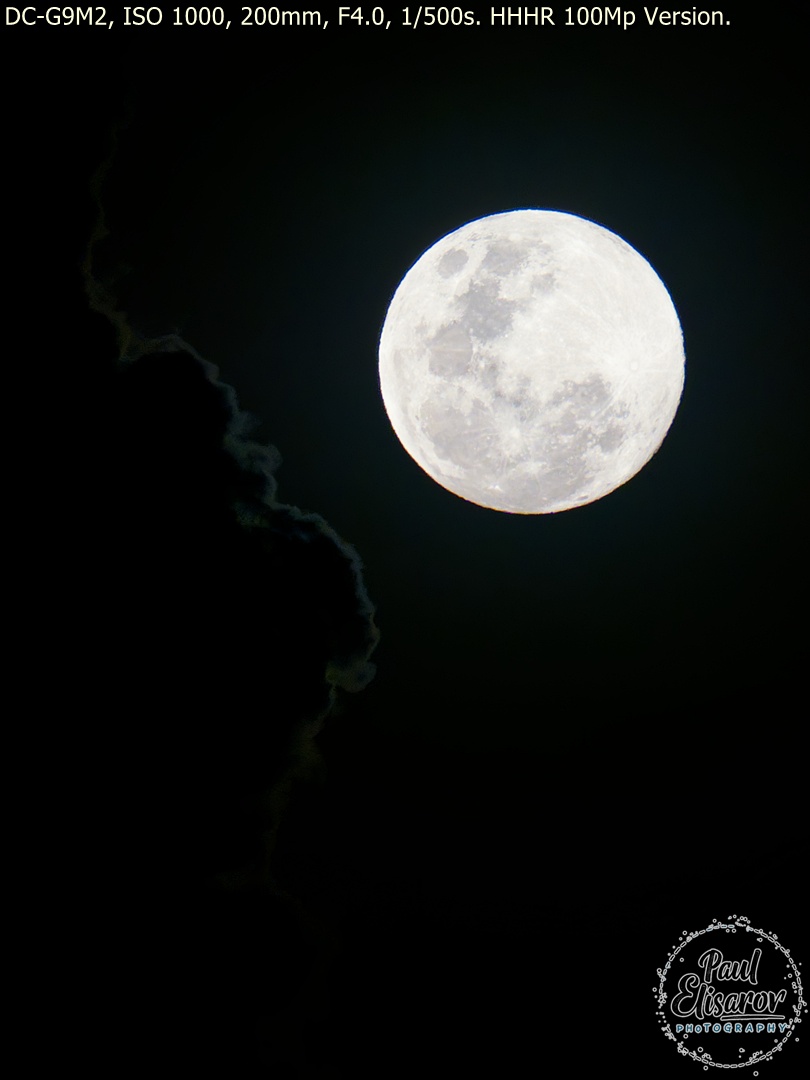
HHHR: The Hidden Gem
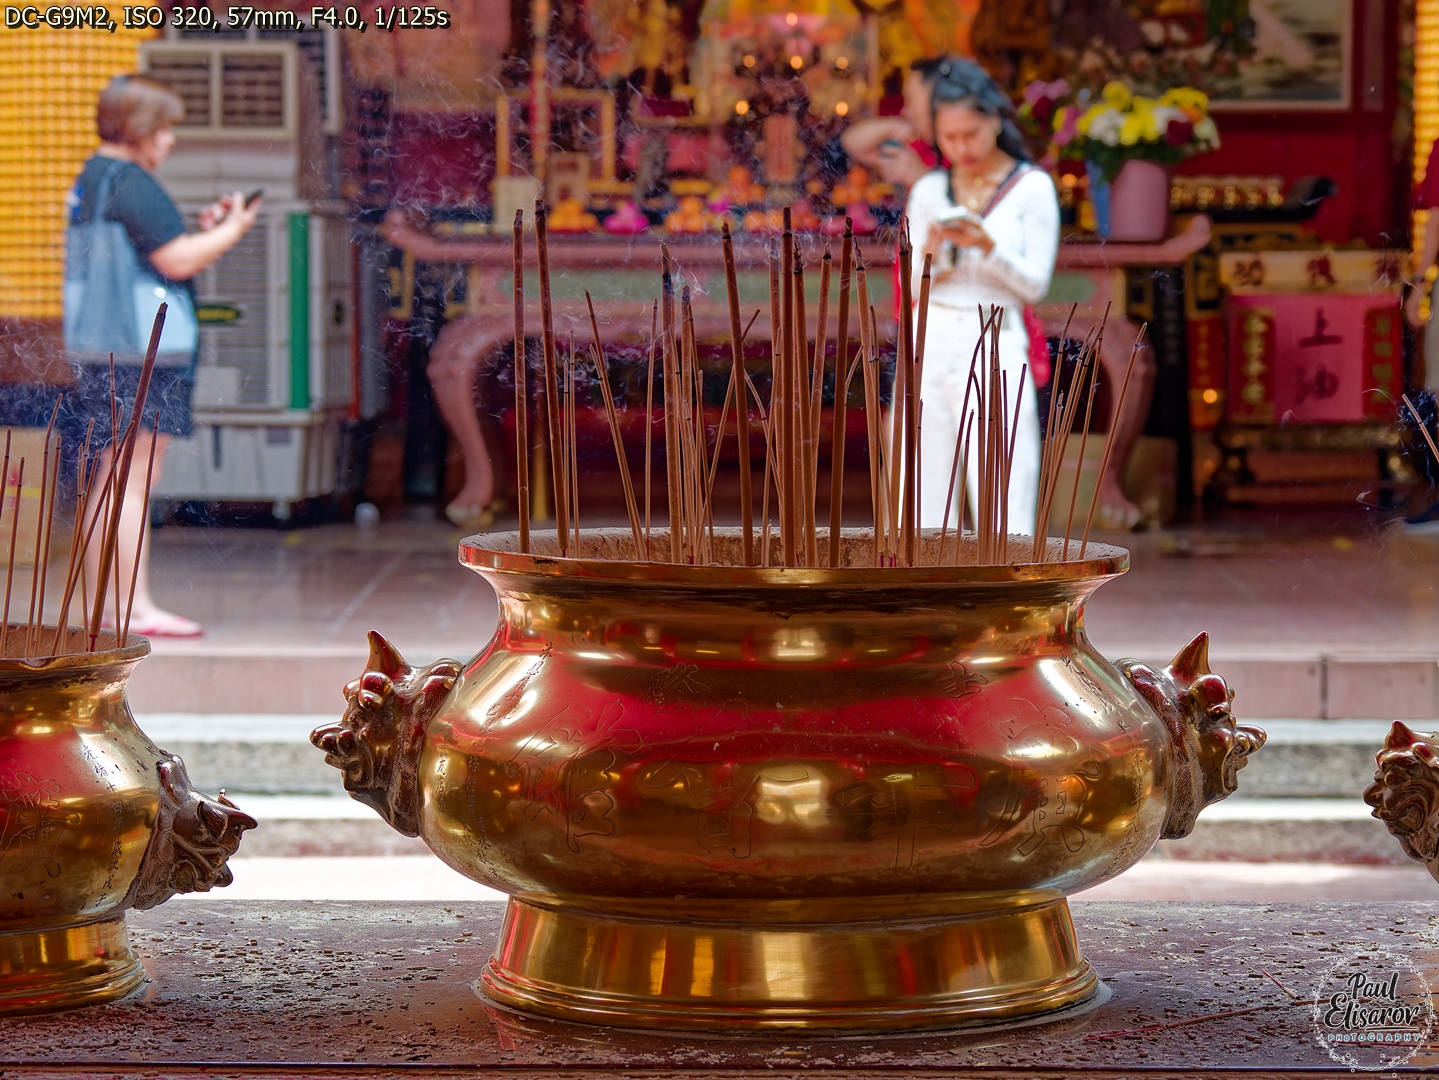
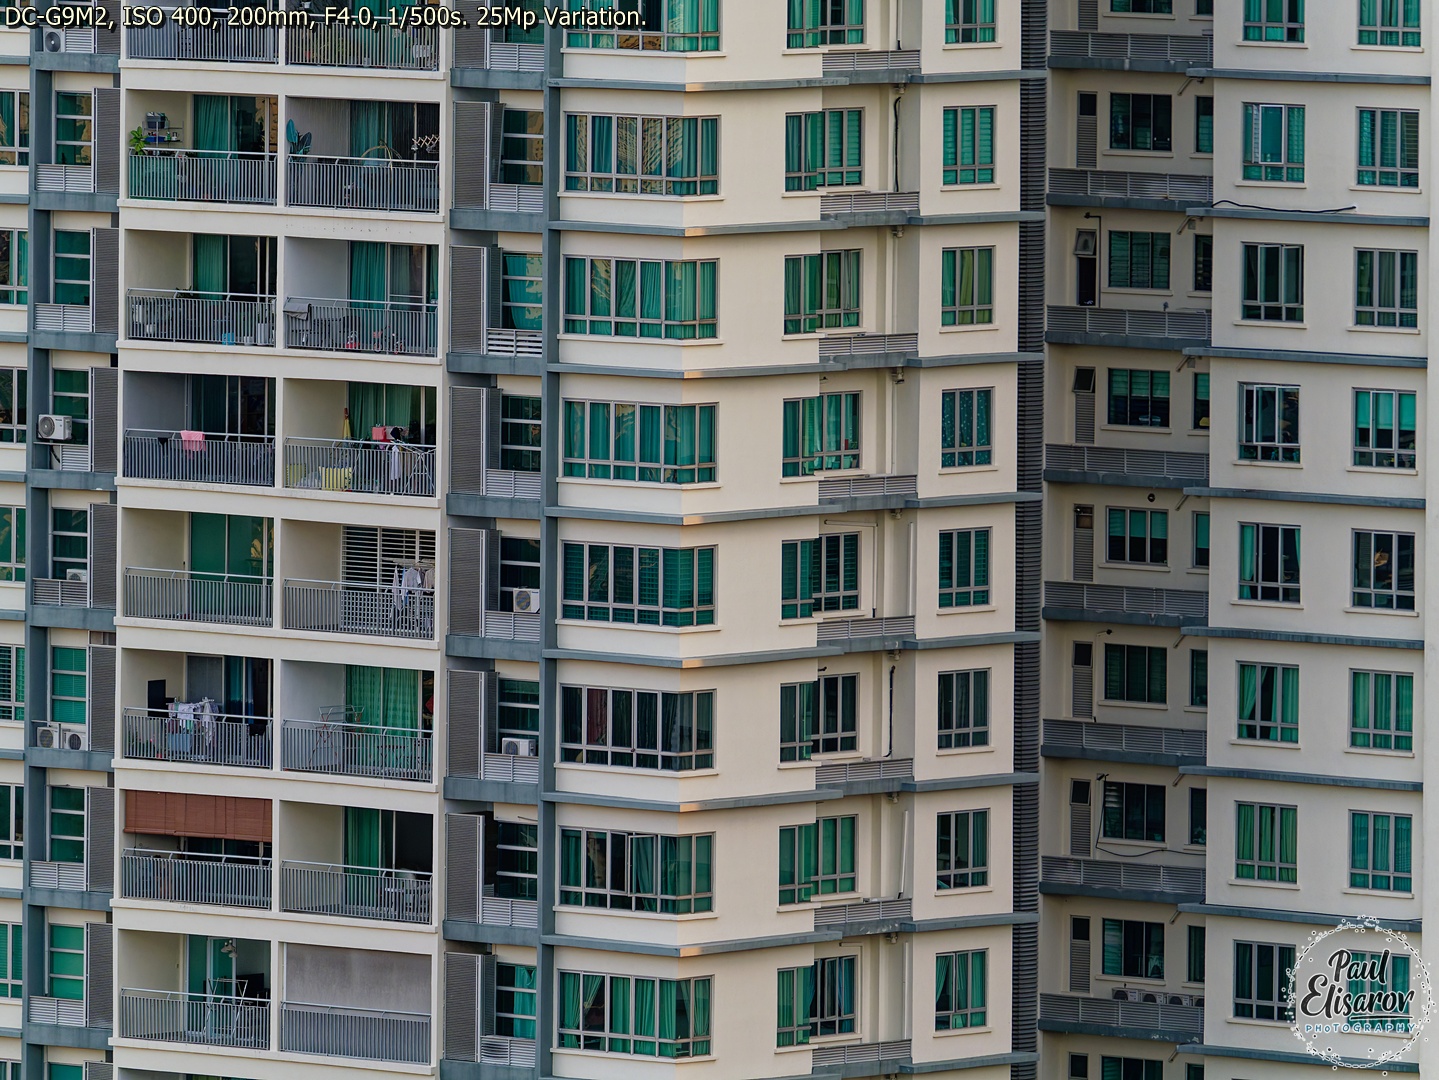
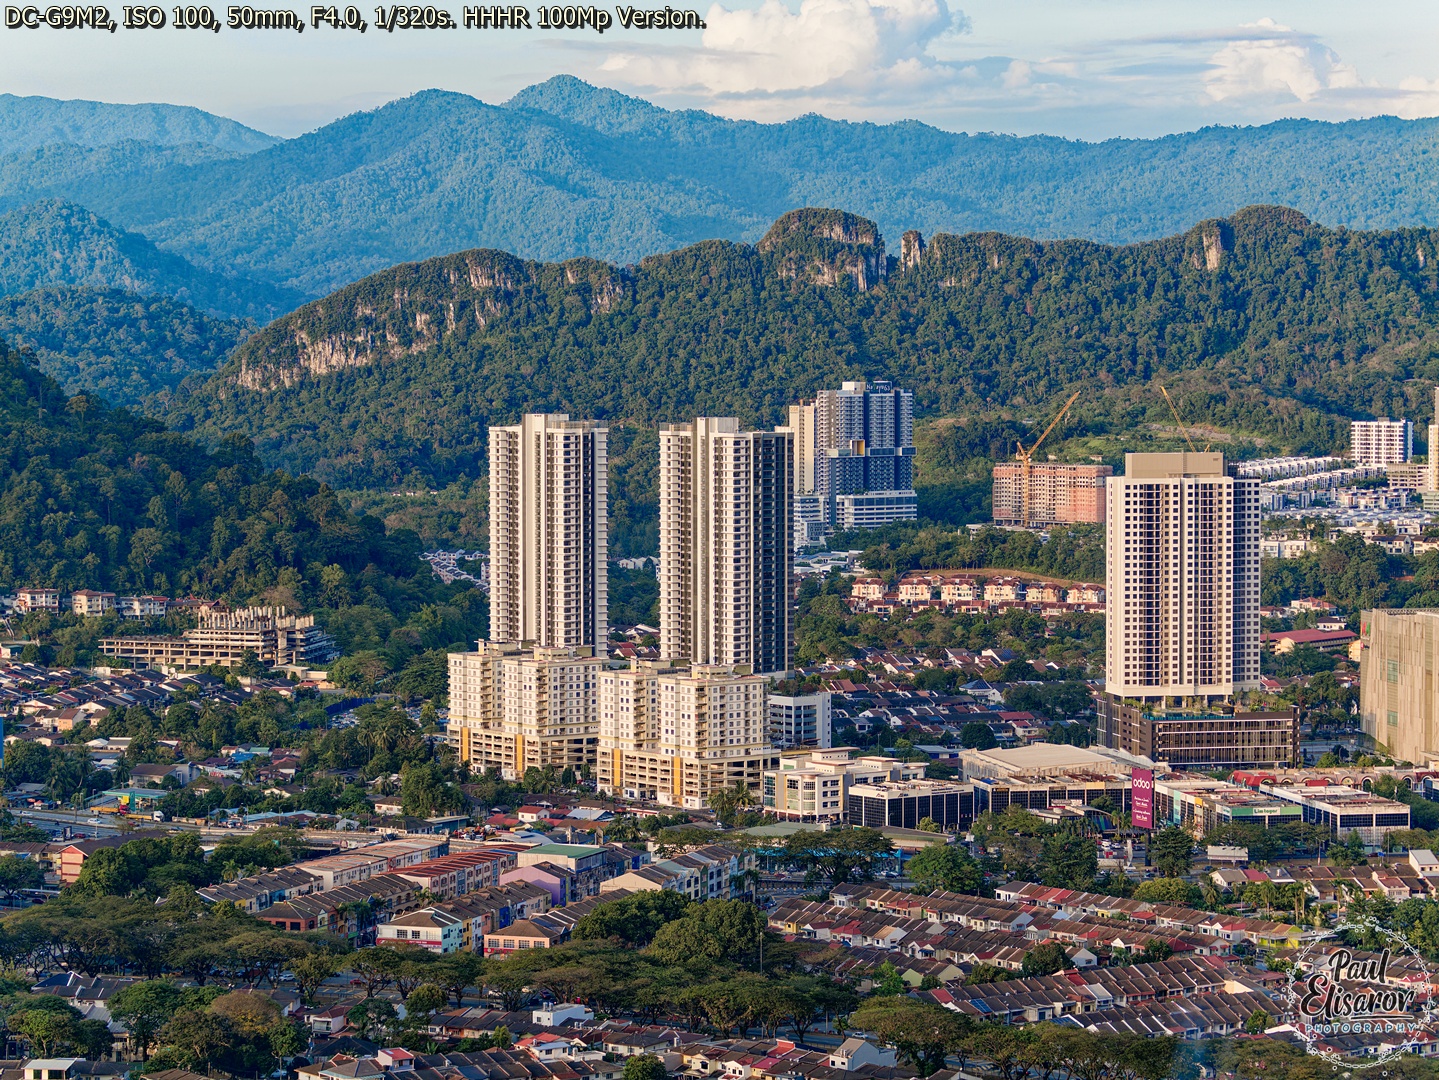
Special attention must be paid to HHHR (Hand Held Hi Res) mode. This feature, shooting from the hand, creates a single 100MP RAW file. That's right—one hundred megapixels. It's a composite of eight frames captured in rapid sequence. As the name implies, you get a high-resolution file with motion suppressed—moving objects appear once, not multiple times, unless they're moving so fast the camera interprets them as separate objects. But does It Actually Deliver More Detail? I'll let the images speak for itself:
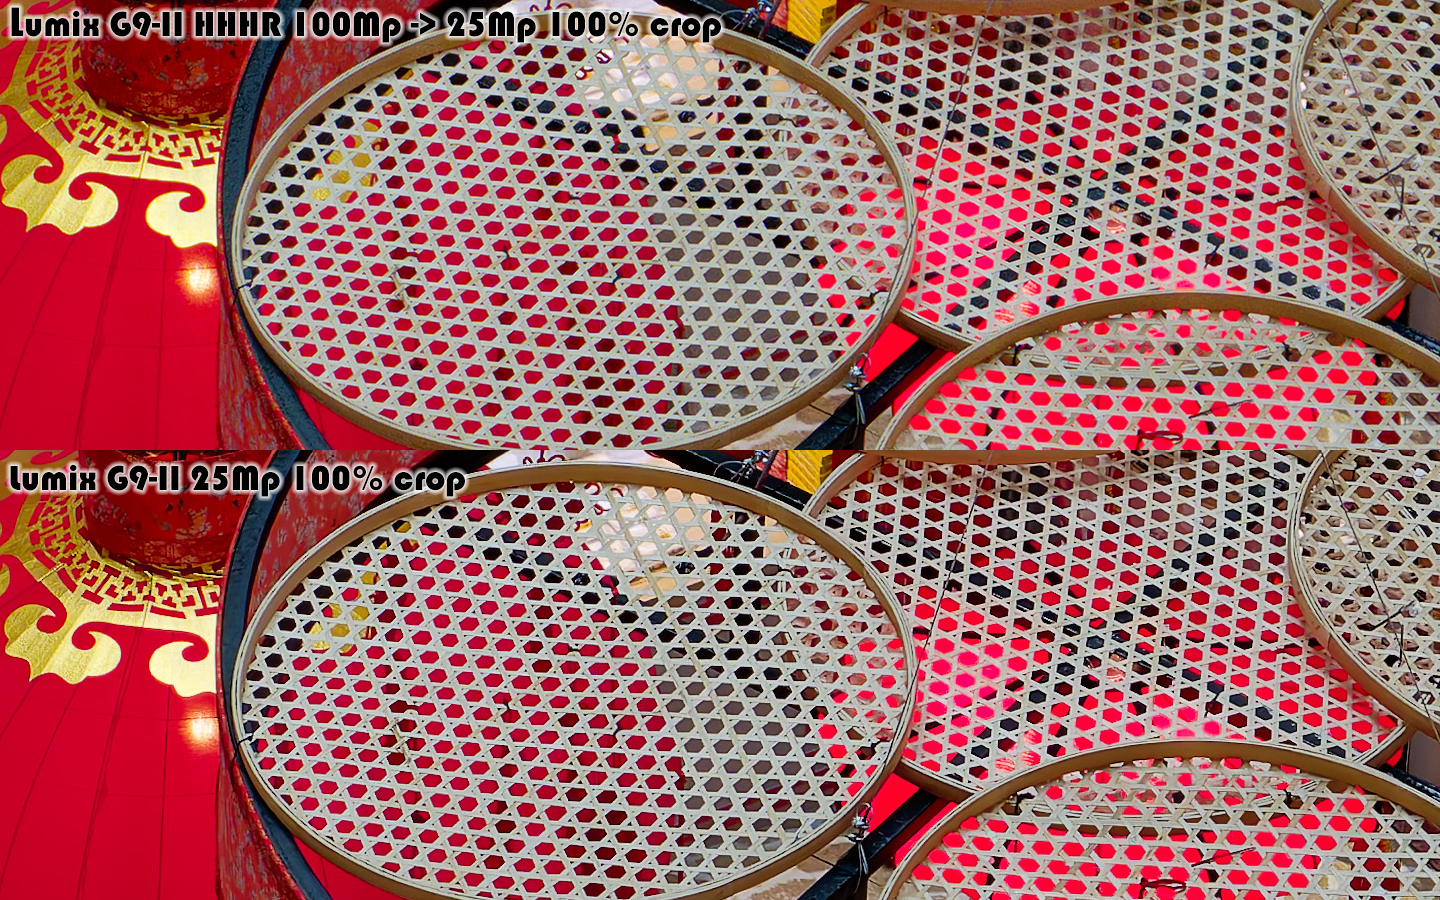
Look at tiny (on this picture) holes in the round hanging things... On 25Mp picture the color under those holes is dark, almost black. But on 100MP file these holes are red! This shows that 100Mp file has much better color depth and more dynamic range! - more information in such places. And that is a killer feature! It is VERY useful for landscapes if part of the landscapes are badly lit. This eliminates last possible doubt about Micro Four Thirds' dynamic range and color depth. And if you ask me, the resulting 100MP image rivals images from Medium Format in this regards.
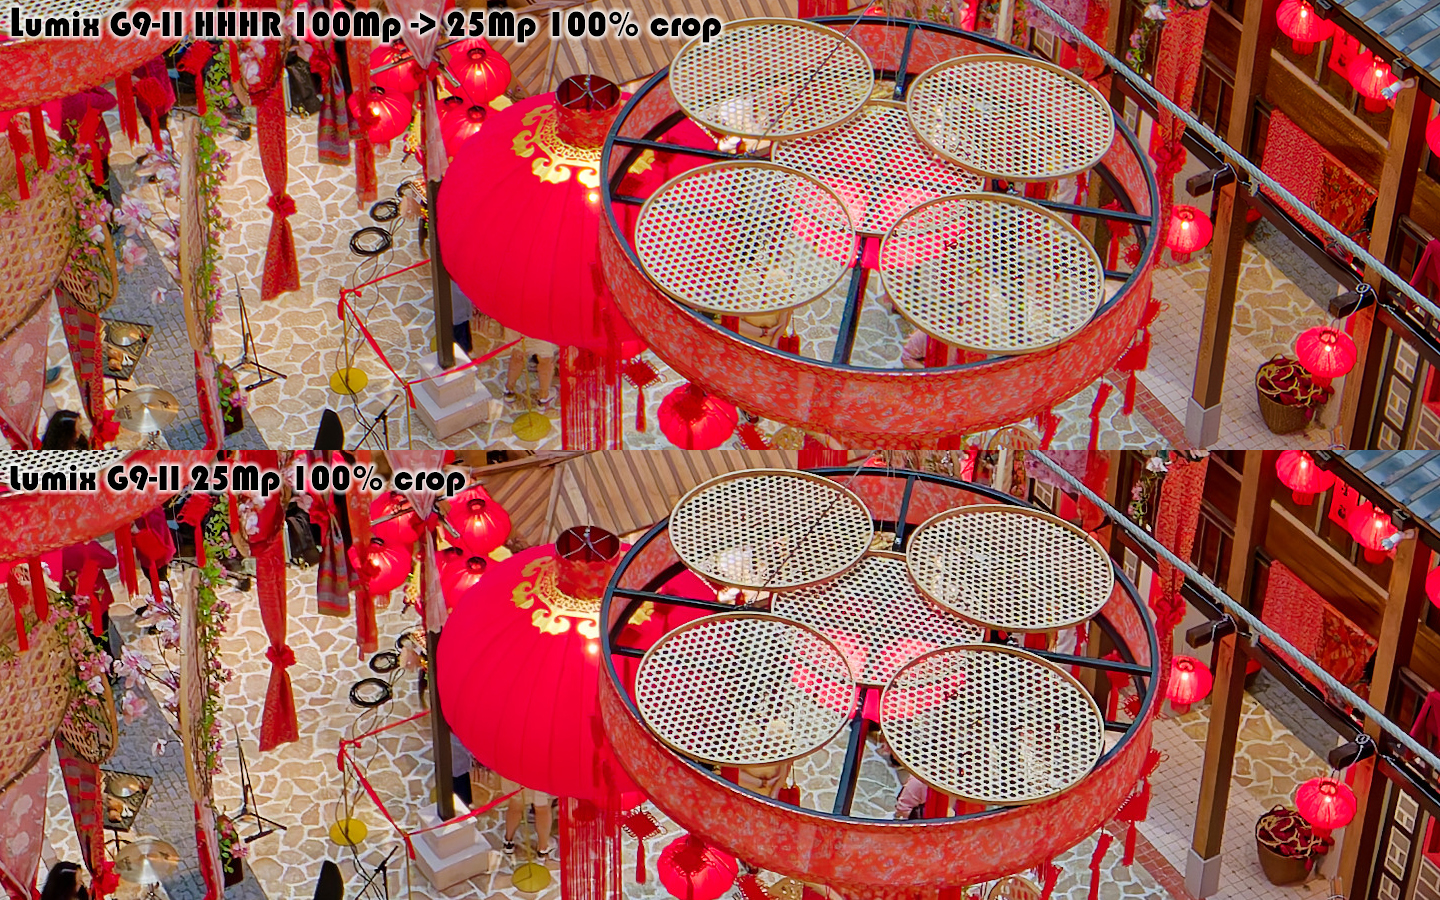
As you can see, you don't get a dramatic increase in practical detail. The difference exists, but it's subtle—certainly not the game-changer the megapixel count suggests.
The Real Benefits Are Elsewhere
The true value of HHHR lies in three areas:
Moiré Elimination: On problematic fabrics, architectural details, or any surface prone to moiré, HHHR completely eliminates the issue. It's gone. This alone makes it invaluable for certain types of photography.
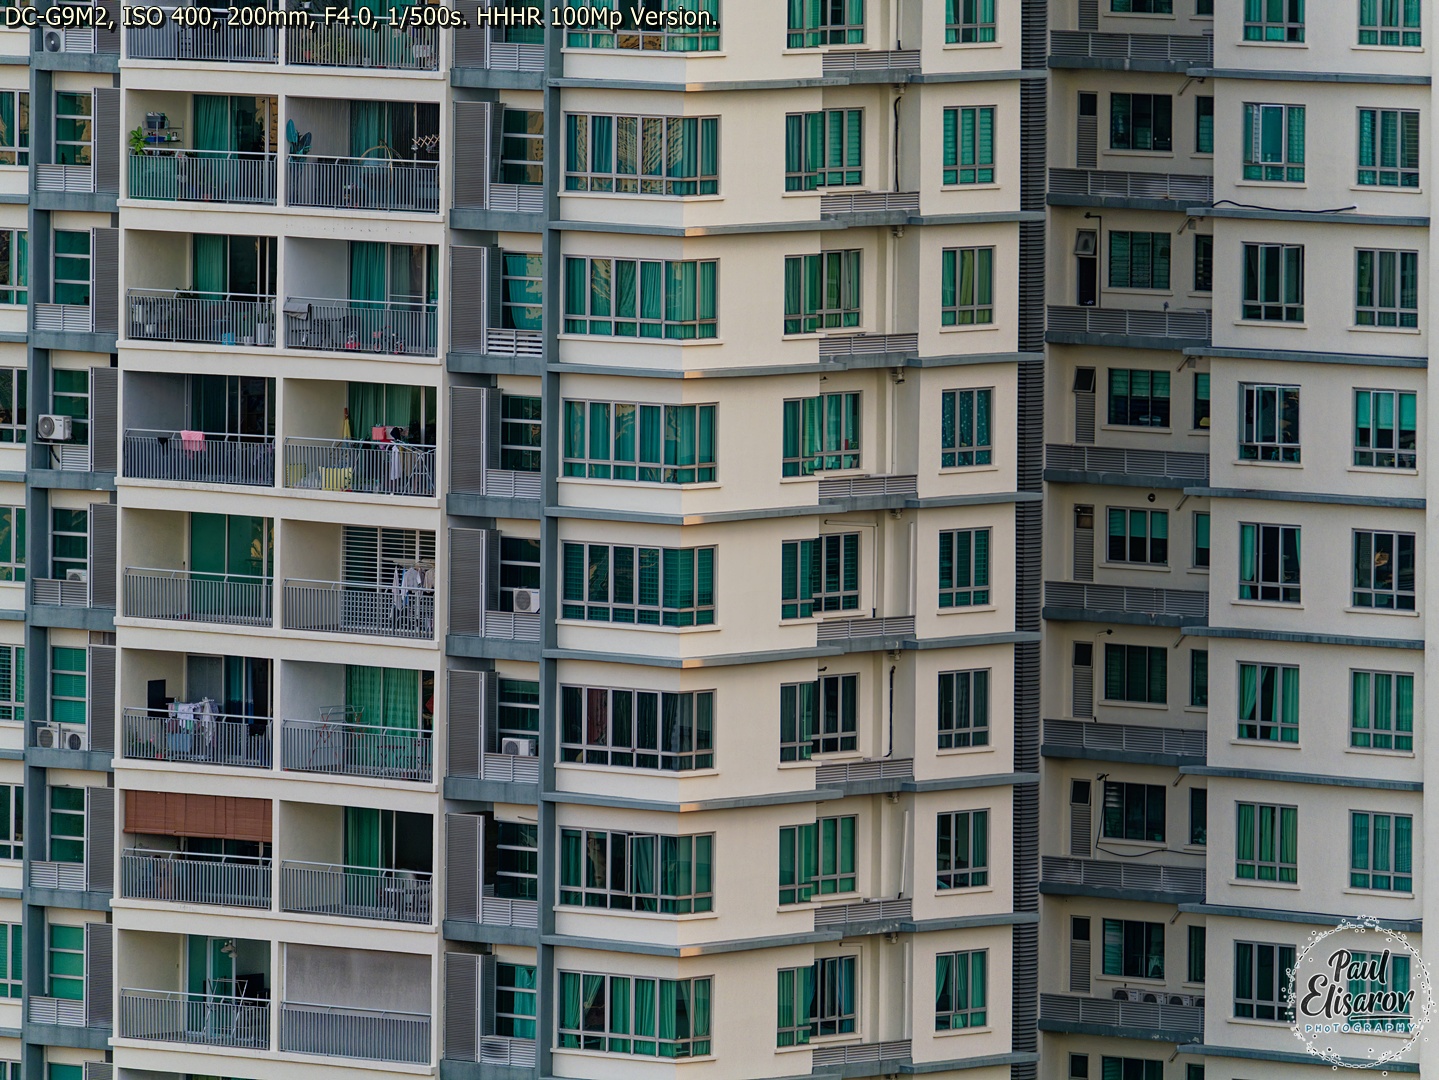
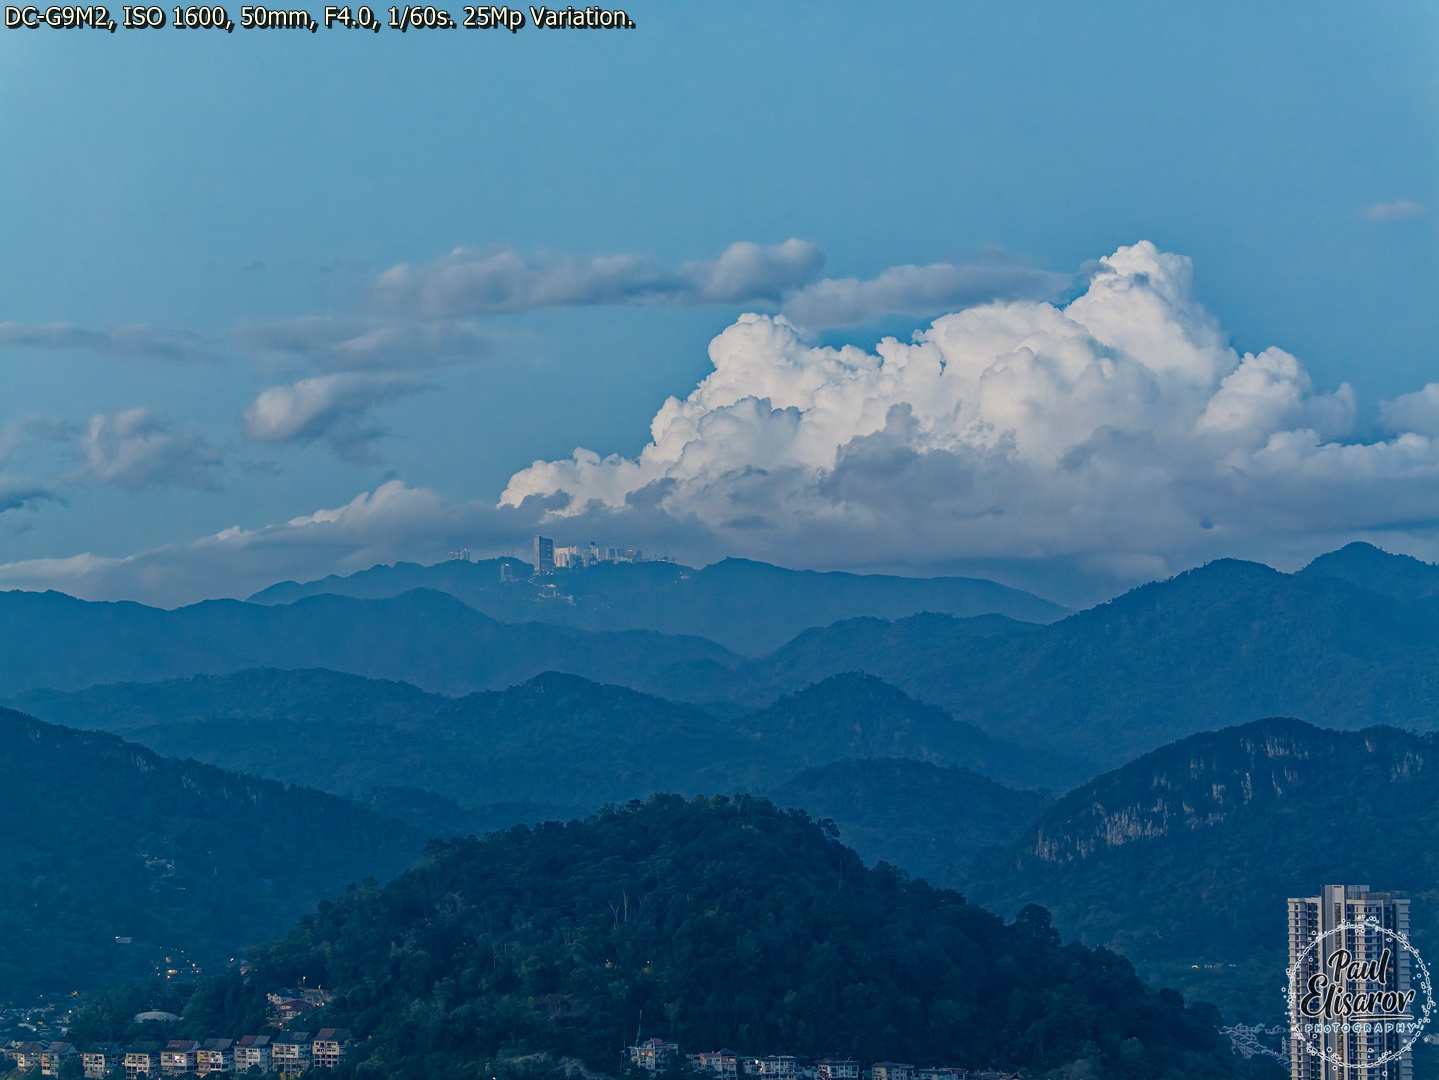
Bit Depth: The HHHR RAW file is 16-bit. That extra color depth means smoother gradients, better shadow recovery, and more latitude in post-processing. And in HHHR file it's used fully, this means basically more flexible photos for you to postprocess. (look at the details on the misty mountains, 100Mp has more.)

And you can do this handheld, anytime, anywhere! For some reason, Panasonic doesn't trumpet this feature from the rooftops—they quietly tuck it into the menu. It's the G9II's secret weapon, and once you understand what it really does, you'll use it far more than you expected.
Processing G9II RAW Files: My DxO Photo Lab Workflow
Since I mentioned RAW processing, let me be specific: I use DxO Photo Lab as my primary RAW converter for G9II files. The reason is simple: DxO's DeepPRIME XD noise reduction is unmatched for high-ISO Micro Four Thirds files. At ISO 12800, where the G9II hits its ceiling, DxO can produce results that are very usable.

Price and Value: The $650 Question
The G9II launched at $1,899 body-only, now a used one can be found for $1200-$1300. Ehile the original G9 now sells for around $1200 new, or $500 used. That's a $650+ difference. Is it worth it?
The G9II is the most capable M43 camera for stills, period. The value calculation comes down to your specific needs. For me, the all the increments in different parts of the camera and the best image quality I ever was able to get from any camera were well worth it. Still, the G9 at current prices is a very effective buy!
1.1K views